MA in Photography, Falmouth University, Module 4, Sustainable Prospects; Week Four : Practice Development
Having established my research I prepared myself for some practical experimentation in making concrete and fusing images to the curing surface. I was ready for it to be messy and for failure to be almost inevitable, but I was clear that I would document these, via this journal, and use the learning for step two.
All the images were taken with my iPhone, sometimes with rather wet and dirty fingers. I documented this very much as step one in the journey to creating new work.
Here is the visual recording of my journey;
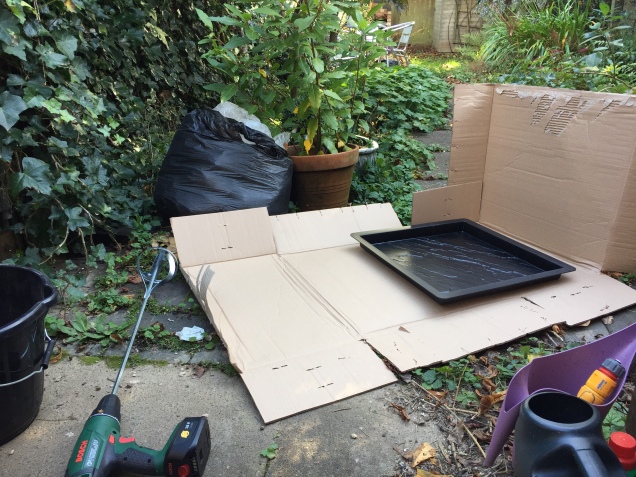
I purchased these things;
3 450x450x37mm moulds, figure 1, that would provide the discipline of an exact square format and, when used to mould a concrete panel would not be too heavy to manoeuvre.
4 bags of quick drying concrete
A paddle mixer to use in a drill.
A bucket for mixing.
A pair of sturdy gloves.
A steel trowel
Some cardboard.

I added water to the mix in a bucket, figure 2. Learning point one – mixing a circa 15kg batch was too much for full distribution of the water (as I poured the mixture into the mould I had powdery pockets remaining which were remixed). Notably this is a chemical reaction of hydration and thus needs to be carefully controlled.

Having watched several YouTube videos on making concrete I noted that it was important to create an ‘easy peel’ method to remove the mould once the concrete had hardened to the point that removal was viable. I used olive oil for that purpose, figure 3.

The texture of the gloopy concrete mixture was a rather attractive surface to capture, figure 4. I was beginning to see a parallel with the ‘analogue’ photographic tradition of capturing the fluid with the moment of the shutter and then the darkroom development process where the fluid chemical reaction creates the image that is then fixed and thus solid.

I poured the gloopy mix into the mould, figure 5.

Then smoothed the surface to a pleasingly level finish with the trowel, figure 6.

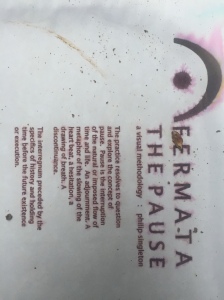
Here was the point of my personally unique experiment; I printed an image and some text on sheets of ‘standard’ thickness photocopy paper, deliberately chosen as it is absorbent and also the thinness would allow an interaction with the wet concrete. Then text and an image on thin sheets of tracing paper. All four were printed through an Epson R2000 inkjet printer, figure7.

The tracing paper immediately curled up into a tight roll on contact with the wet concrete, figure 8. I had to scrabble around for off-cuts of timber to hold down the edges whilst being careful that these off-cuts did not set into the concrete.

The pure, flat blue of the sky on this image immediately took on a veinous effect (figure 9) on contact with the dampness. An excess of water bled across the edge of the print which was another learning point – even slight dips in the surface will encourage overflow.

Air bubbles underneath the tracing paper were probably inevitable, figure 10.

In figure 11 the bleed in the inkjet as the moisture seeps through and causes this ink spread. The mark was caused by careless moving of materials.

A side view, figure12, of the four papers in place awaiting the drying/curing process.
A day later, these were the results;

The water that crept across the edge of the sheet had become a solid.

A close-up of the prints and the new patterns and colours that are drawn out though the process, figure 14.

The tracing paper, figure 15, has wrinkled markedly but has again created a range of new textures at the surface which perhaps makes the veneer more fascinating than the image itself.
Another learning point here; water was splashed onto the surface during the cleaning up process, then leaving the cast outdoors overnight (even though loosely covered) allowed fine dust and leaves to fall onto the still damp surface and mark it/leave deposits.
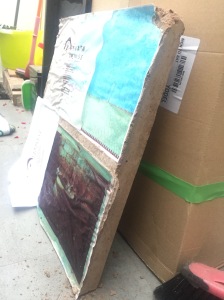
Having extracted the cast from the mould onto a soft surface I was pleased to find there was a good strength to the body of the cast. The spalling was from the sides of the mould. This oblique view shows the varying degree of wrinkling that occurred.

Despite the cast being sturdy overall, this corner simply crumbled, figure 18 – a clear indicator of a lack of water in the whole of the mix. Another learning point.

The last view, from above.
Conclusions
The experimentation should continue to a future stage, with the following points covered;
1 Mixing concrete and water very thoroughly and in stages and remove any powder pockets. Greater control is needed in the making and drying process to avoid marking and contamination.
2 Attempt a thinner fill to the mound, whilst noting that trowelling would be more difficult – this would test whether thinning would be viable without too much loss of strength. I may consider a fine reinforcing mesh.
4 Manage the process with great care and with more precision around placing prints onto the surface, with a focus on material type and weight. For example if I could print onto linen then place that onto concrete the effect could be fascinating.
5 Research resins for use to coat the finished product to preserve and protect the fused images.
6 Ensure that the whole experimental stage provides a full and proper root back to the principles of my practice and its related research.
Onwards!
ends
 Figure 3

 Figure 5